Difference between revisions of "Designer Easter Garden"
From PinataIsland.info, the Viva Piñata wiki
(Added page from christmas template) |
(Added some links. Two buttons) |
||
| (One intermediate revision by the same user not shown) | |||
| Line 1: | Line 1: | ||
==Making an Easter Garden== | ==Making an Easter Garden== | ||
| − | + | Have you ever wanted to make an Egg-cellent Easter spring garden? Luckily, Trouble In Paradise has a hopping good selection of Easter items!<br /> | |
| − | + | There are plenty of pinatas that will make the cut in this Springtime setting. Some great examples would be [[Bunnycomb]]s (obviously!) [[Juicygoose|Juicygeese]], [[Robean]]s, and [[Bispotti]]s.<br /> | |
<youtube size="large">1z2qKYXs2uM</youtube> | <youtube size="large">1z2qKYXs2uM</youtube> | ||
| Line 10: | Line 10: | ||
Here are a few Pinata Vision cards and characters from my Easter garden you can scan to get started: | Here are a few Pinata Vision cards and characters from my Easter garden you can scan to get started: | ||
<gallery caption="Designer Easter Garden Cards" widths="200px" perrow="2"> | <gallery caption="Designer Easter Garden Cards" widths="200px" perrow="2"> | ||
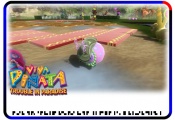
| − | Image: | + | Image:Juicygoose-TroubleInParadise-House-PV.jpg|A flowery bonnet Juicygoose home. |
| − | Image: | + | Image:Bunnycomb-TroubleInParadise-House1-PV.jpg|A hutch for all of your Easter bunnies. |
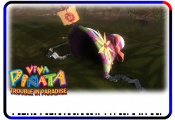
| + | Image:Juicygoose-TroubleInParadise-Easter-DG-PV.jpg|Juicygoose Lucy lays the eggs. | ||
| + | Image:Bunnycomb-TroubleInParadise-Easter-DG-PV.jpg|Ceaser the Bunnycomb, deliverer of baskets! | ||
| + | Image:Bispotti-TroubleInParadise-Easter-DG-PV.jpg|Omelet, Bispotti drifter. | ||
| + | Image:Robean-TroubleInParadise-Easter-DG-PV.jpg|Eggberta, Robean dramaqueen. | ||
| + | |||
</gallery> | </gallery> | ||
<br> | <br> | ||
===Ideas=== | ===Ideas=== | ||
| + | *Use pastel [[variant]]s of your pinatas and dress them in their Easter best! | ||
| + | *Pinata houses are a perfect touch. Use the Juicygoose and Bunnycomb house for your egg-cellent friends to live in. | ||
| + | *Use [[accessories]] like bonnets and pink jewlery to gussy them up for the day. | ||
| + | *Why not make all pinatas a bunny with the Bunnycomb ears and Tap shoes? | ||
| + | *No Easter garden is complete without a [[Cluckles]] to hatch all of those bouncing pinata eggs. Make sure to make it a variant! | ||
| + | *[[White Flutterscotch|Flutterscotches]] of all colors give a springtime ambiance to the garden. Don't forget their cozy little home beyond green hedges. | ||
*Make an Easter Egg by following these instructions: | *Make an Easter Egg by following these instructions: | ||
#Start by making a stripe that will be the equator of the egg. You can make the egg diagonal or straight (both my examples are diagonal). I suggest using tiles for this even if you want it to be something else by the end. Some good tile options are the gold tile, the star tile, the ceramic tile, and the railroad "turnaround" track. | #Start by making a stripe that will be the equator of the egg. You can make the egg diagonal or straight (both my examples are diagonal). I suggest using tiles for this even if you want it to be something else by the end. Some good tile options are the gold tile, the star tile, the ceramic tile, and the railroad "turnaround" track. | ||
| − | #Check the "birds' eye view" frequently by clicking the right stick. | + | #Check the "birds' eye view" frequently by clicking the right stick {{Button|rs}}. |
#Place another single tile at each pole of the egg. These can be removed later, but you need them to guide placing the surface. | #Place another single tile at each pole of the egg. These can be removed later, but you need them to guide placing the surface. | ||
| − | #Check the proportions between the equator and the poles by clicking the right stick. | + | #Check the proportions between the equator and the poles by clicking the right stick {{Button|rs}}. |
#Make sure your background surface is filled in everywhere (my examples both use grass). | #Make sure your background surface is filled in everywhere (my examples both use grass). | ||
#Now, with your new surface choice (brown, gold, or white), start at the pole and slowly make a circle by moving in arcs from the pole to the side of the equator to the pole, etc., all the way around. | #Now, with your new surface choice (brown, gold, or white), start at the pole and slowly make a circle by moving in arcs from the pole to the side of the equator to the pole, etc., all the way around. | ||
| Line 28: | Line 39: | ||
#You can make polka dots by starting to lay down and surface and then stopping again without moving. | #You can make polka dots by starting to lay down and surface and then stopping again without moving. | ||
#If you have a hard time making a nice looking oval with the instructions above, you can make a perfect circle by using 2 controllers and activating the couch socialite feature. With the other controller on (but not moving the cursor), you can press straight up or down while laying a surface and your cursor will "orbit" around the other one because of how the camera moves. This will lay a perfect circle. | #If you have a hard time making a nice looking oval with the instructions above, you can make a perfect circle by using 2 controllers and activating the couch socialite feature. With the other controller on (but not moving the cursor), you can press straight up or down while laying a surface and your cursor will "orbit" around the other one because of how the camera moves. This will lay a perfect circle. | ||
| + | |||
| + | *[http://pinataisland.info/forum/showthread.php?t=15690 The original Easter Garden thread] | ||
Latest revision as of 19:48, 7 July 2009
Making an Easter Garden
Have you ever wanted to make an Egg-cellent Easter spring garden? Luckily, Trouble In Paradise has a hopping good selection of Easter items!
There are plenty of pinatas that will make the cut in this Springtime setting. Some great examples would be Bunnycombs (obviously!) Juicygeese, Robeans, and Bispottis.
Characters
Here are a few Pinata Vision cards and characters from my Easter garden you can scan to get started:
- Designer Easter Garden Cards
A flowery bonnet Juicygoose home.
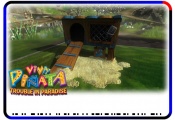
A hutch for all of your Easter bunnies.

Juicygoose Lucy lays the eggs.
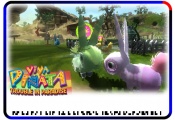
Ceaser the Bunnycomb, deliverer of baskets!
Omelet, Bispotti drifter.
Eggberta, Robean dramaqueen.


Ideas
- Use pastel variants of your pinatas and dress them in their Easter best!
- Pinata houses are a perfect touch. Use the Juicygoose and Bunnycomb house for your egg-cellent friends to live in.
- Use accessories like bonnets and pink jewlery to gussy them up for the day.
- Why not make all pinatas a bunny with the Bunnycomb ears and Tap shoes?
- No Easter garden is complete without a Cluckles to hatch all of those bouncing pinata eggs. Make sure to make it a variant!
- Flutterscotches of all colors give a springtime ambiance to the garden. Don't forget their cozy little home beyond green hedges.
- Make an Easter Egg by following these instructions:
- Start by making a stripe that will be the equator of the egg. You can make the egg diagonal or straight (both my examples are diagonal). I suggest using tiles for this even if you want it to be something else by the end. Some good tile options are the gold tile, the star tile, the ceramic tile, and the railroad "turnaround" track.
- Check the "birds' eye view" frequently by clicking the right stick
 .
. - Place another single tile at each pole of the egg. These can be removed later, but you need them to guide placing the surface.
- Check the proportions between the equator and the poles by clicking the right stick .
- Make sure your background surface is filled in everywhere (my examples both use grass).
- Now, with your new surface choice (brown, gold, or white), start at the pole and slowly make a circle by moving in arcs from the pole to the side of the equator to the pole, etc., all the way around.
- Fill in the oval you just drew.
- Decorate the egg with tiles, other surfaces (use the smaller size cursor too), flowers, holes, gems, etc.
- Try out some variety with the tiles. You may like something you wouldn't have thought of. Now that you have your oval drawn, you can remove the tiles at the equator and poles to use something else there if you want.
- You can make polka dots by starting to lay down and surface and then stopping again without moving.
- If you have a hard time making a nice looking oval with the instructions above, you can make a perfect circle by using 2 controllers and activating the couch socialite feature. With the other controller on (but not moving the cursor), you can press straight up or down while laying a surface and your cursor will "orbit" around the other one because of how the camera moves. This will lay a perfect circle.